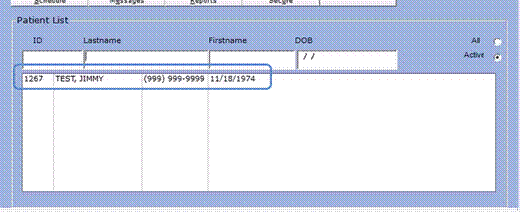
- Search the Patient List to make sure the patient isn’t already in the system.
- Go to Patient > Add New Patient.
- Fill in every field with a red label: First Name, Last Name, Date of Birth and Sex.
- Add the address and at least one phone number.
- Click Save & Close, then OK on the confirmation.
|
Field |
Status |
What to enter |
|
First Name |
Required |
The patient’s legal first name. |
|
Last Name |
Required |
The patient’s legal last name. |
|
Date of Birth |
Required |
Month, day and year (MM/DD/YYYY). |
|
Sex |
Required |
Select M or F. |
|
Street, City, State, Zip |
Recommended |
Use Street (Line 2) for an apartment or suite number. |
|
Home, Cell or Work Phone |
Recommended |
At least one number so the office can reach the patient. |
|
Middle, Suffix, Email |
Optional |
Fill in if the patient uses them. |
Steps Step 1 Search for the patient first
Before creating a chart, check that the patient doesn’t already have one. On the main screen, use the search fields in the Patient List (ID, Lastname, Firstname or DOB). If the patient comes up, use the existing chart instead of adding a new one.
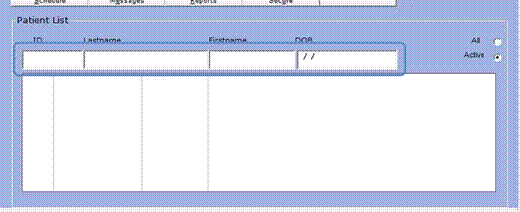
Figure 1. The Patient List search fields on the main screen.
|
Why it matters: A duplicate chart splits a patient’s history across two records. |
- Click the Patient menu at the top of the screen.
- Choose Add New Patient.
The Enter New Patient Demographics window opens.
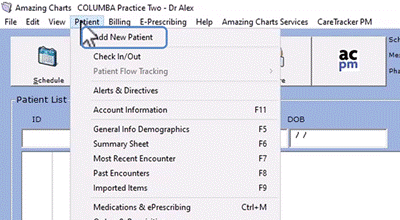
Figure 2. Patient menu > Add New Patient.
Step 3 Check the required fieldsFields with red labels are required: First Name, Last Name, Date of Birth and Sex. The Patient ID box shows NEW until you save. Amazing Charts assigns the ID number for you.
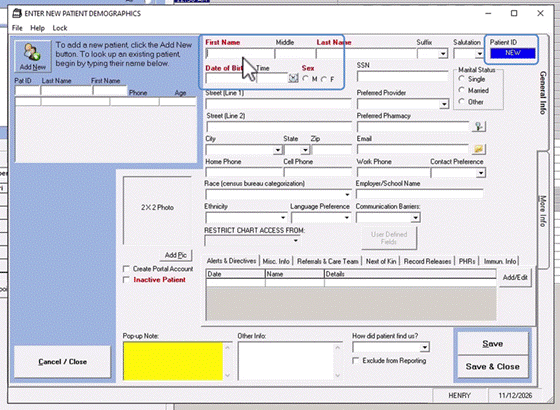
Figure 3. The Enter New Patient Demographics window. Required labels and the Patient ID are outlined.
Step 4 Enter the nameClick in the First Name field and type the patient’s first name. Then click in Last Name and type the last name. If the patient uses a middle name or a suffix, there are fields for those too.

Figure 4. First Name and Last Name filled in.
Step 5 Enter the date of birth and sexType the Date of Birth as month, day and year (for example, 11/18/1974). Then select the patient’s Sex.

Figure 5. Date of Birth entered and Sex selected.
|
Tip: Double-check the birth date before moving on. It’s one of the main ways patients are matched later. |
- Type the street address in Street (Line 1).
- Use Street (Line 2) for an apartment or suite number, if there is one.
- Fill in the City, choose the State from the list, and enter the Zip.
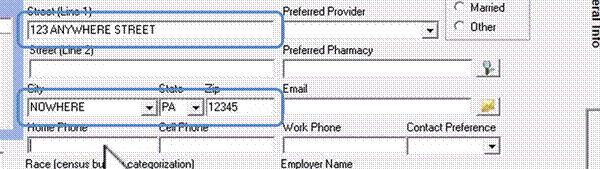
Figure 6. Street, City, State and Zip filled in.
Step 7 Add a phone numberEnter at least one phone number so your office can reach the patient. Cell Phone, Work Phone and Email are optional.
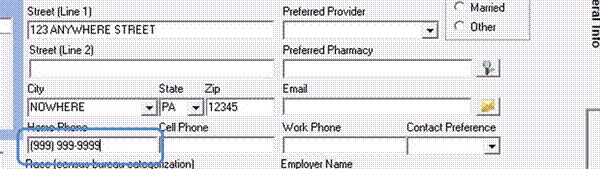
Figure 7. Home Phone entered.
Step 8 Save and close- Click Save & Close in the bottom-right corner of the window.
- A message says Patient information was updated. Click OK.
- The new patient now appears in the Patient List with their own ID number.
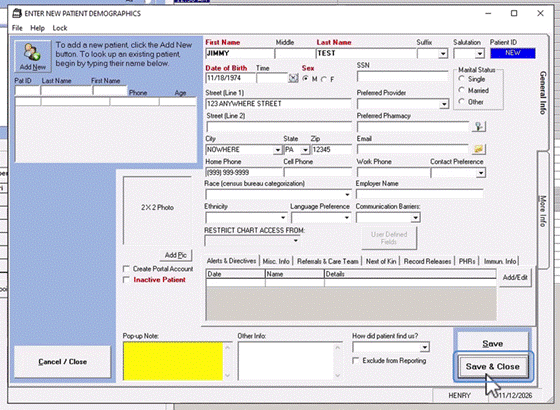
Figure 8. The Save & Close button.
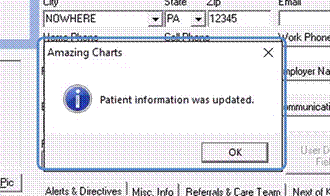
Figure 9. The confirmation message.