
This guide walks you through setting the default printer used for electronic prescriptions (eRx) in Amazing Charts.
- Log in to Administrator Options
From the menu bar, click View, then select Administrator Options.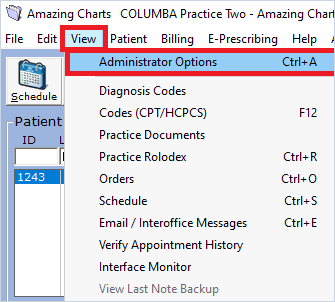
The View menu with Administrator Options selected. - Open Set Prescription Format
In the Practice-Wide Preferences window, click the Set Prescription Format icon.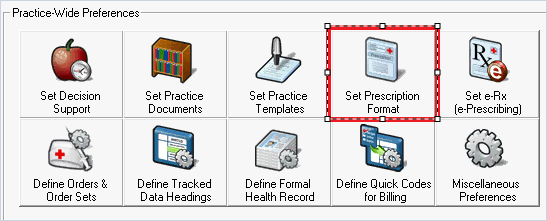
The Practice-Wide Preferences window with Set Prescription Format selected. - Choose your printer
Use the Select script printer drop-down menu to choose your preferred printer.Note: This is a practice-wide setting. It applies to every computer in your practice and cannot be configured on a per-computer basis.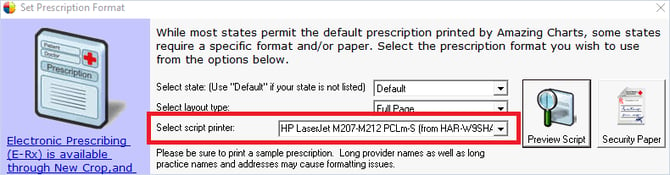 The Set Prescription Format window with the printer drop-down highlighted.
 - Save your changes
Click Save Prescription Preferences to apply your selection.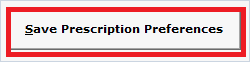
The Save Prescription Preferences button.
Need more help?
If you're still having trouble after completing these steps, contact Amazing Charts Support:
Phone: 866-382-5932, option 1
Email: techsupport@amazingcharts.com