Patient Flow Tracking lets your office see a patient’s status as they move through the office visit, from arrival to provider-ready to check-out. Statuses are set directly from the scheduling grid and are visible to the care team, making it easy to see where each patient is in the visit.
Set a patient’s statusYou can update a patient’s status from the main scheduling screen:
- In the schedule, right-click the patient’s appointment.
- Hover over Patient Flow Tracking to open the submenu.
- Select the appropriate status:
- Checked In
- Ready for Provider
- Checked Out
 [Right-click menu showing Patient Flow Tracking submenu and available statuses]
Caption: Right-click a patient and choose Patient Flow Tracking to set the status.
Once a status is set, hovering over the patient in the scheduling grid displays the current status, such as Checked In. To clear a status that was set by mistake, select Reset from the same Patient Flow Tracking submenu.
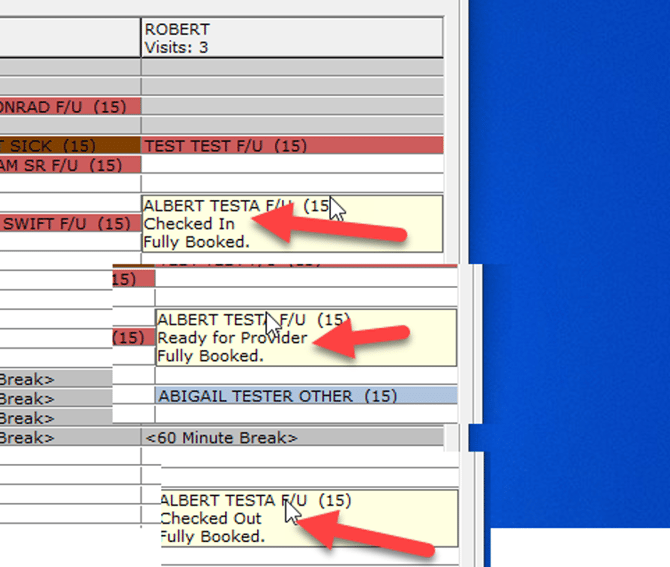
[Scheduling grid showing the current patient status on hover]
Caption: Hovering over a patient shows the current status in the scheduling grid.
Status indicators in the provider viewIn the provider’s schedule view, each patient’s status appears as a small indicator for quick review.
| Indicator | Meaning |
|---|---|
| Blank | No status set |
| Black checkmark | Checked In |
| Green med kit | Ready for Provider |
| Grey checkmark | Checked Out |
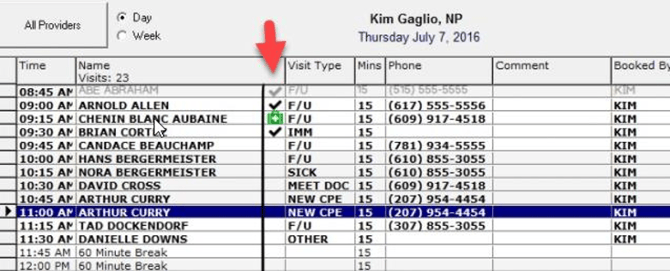
[Provider schedule view showing patient status indicators]
Caption: The provider’s schedule view shows each patient’s status as a small indicator.
Typical visit workflowA common way to use these statuses during a patient visit is:
- Checked In: Front desk staff sets this when the patient arrives.
- Ready for Provider: Clinical staff sets this after rooming and intake are complete, signaling that the patient is ready.
- Checked Out: Set when the visit is complete and the patient leaves.
Tip: Each status follows the same right-click workflow. If the wrong status is set, right-click the patient again and choose a different status, or select Reset to clear it.